 SingFun
How to Reverse Audio on iPhone (Free, No Computer Needed)
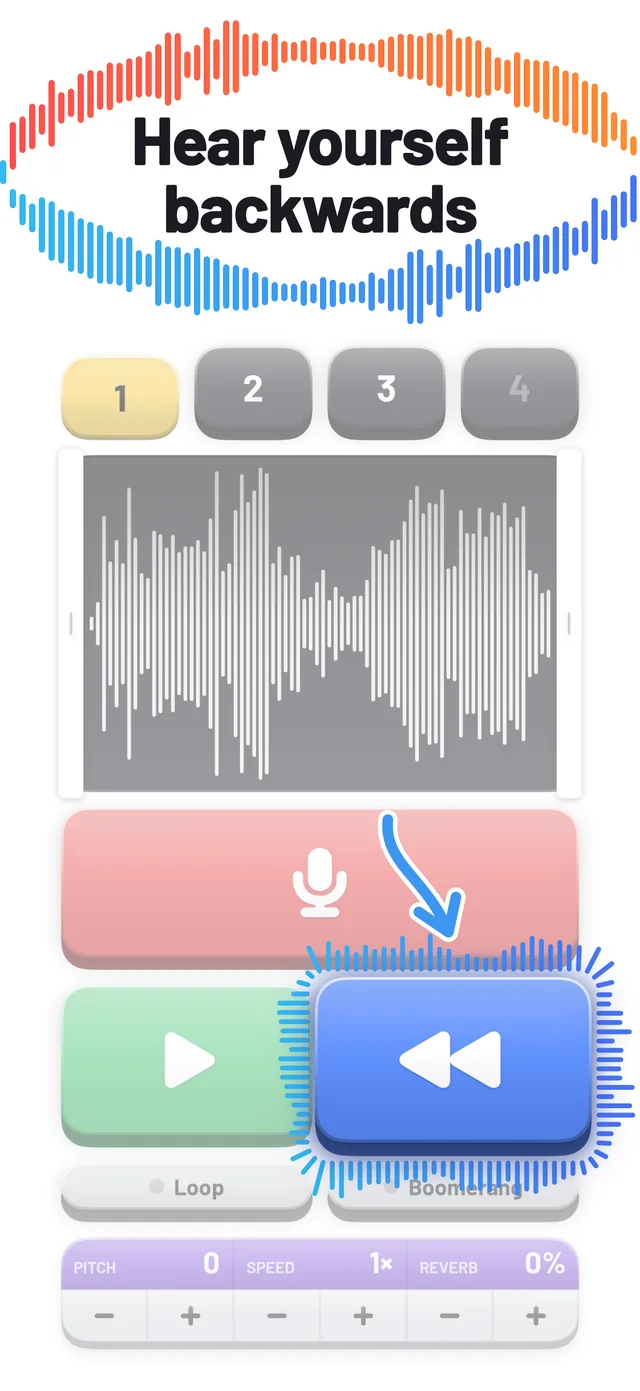
To reverse audio on an iPhone, install a reverse audio app such as SingFun, tap the big red key to record, then tap the blue Reverse key. The sound plays back to front straight away. No computer, no account and no editing skills are needed, and it takes well under a minute.
Apple's own apps do not do this. Voice Memos can trim, replace and enhance a recording, but it has no reverse button. That is why most people reach for a small dedicated app.
Reverse a recording in five steps
- Open SingFun and pick a slot. Slot 1 is selected when you start. On iPhone there are four slots and on iPad six, so you can keep several takes side by side.
- Tap the red Record key and speak or sing. Say something short, a sentence or a lyric. Tap the key again to stop. The first time, iOS asks for microphone permission; allow it.
- Tap Reverse. The blue key plays the recording backwards. The waveform you see is the same one, run from right to left.
- Tap Play to compare. The green key plays the original, so you can flip between forwards and backwards as often as you like.
- Record again to start over. Tapping the red key on a filled slot records over it. Use another slot if you want to keep the old take.
SingFun does not add a backwards-sounding effect. It reverses the order of the audio samples in the recording, so the last millisecond plays first and the first plays last. That is the same thing a desktop editor does when you choose Reverse.
Trim before you reverse
Most recordings have a little silence or a click at each end. Once reversed, that silence moves to the other side and can make a clip feel late or abrupt. Drag the two handles on the waveform to select only the part you want, or tap anywhere on the waveform and the nearest handle jumps there. Play and Reverse use only the region between the handles.
A tighter region also makes reverse effects more dramatic. A single word with no gaps sounds more like an alien language than a long sentence does. Our guide to slowing down, looping and trimming sounds goes deeper on this.
Save a reversed recording as a WAV file
When you like what you hear, tap the highlighted (yellow) slot to open its menu. You get two download options:
- Download Normal saves the trimmed region as it was recorded.
- Download Reverse saves the same region flipped.
Both are saved as WAV files through the standard iOS share sheet, so you can put them in Files, AirDrop them to a Mac, or send them in a message. Two things worth knowing: the file contains only the region between the trim handles, and the live effects (pitch, speed, reverb) are not baked into the download. They are for playing around on the phone.
Reverse a song or an existing audio file
SingFun Premium, a one-time purchase on iPhone and iPad, can import an audio file of up to five minutes into a slot. From there you can trim it and play it backwards just like a recording. This is handy for voice memos, a clip you recorded earlier, or any file you have the right to use. The free version records with the microphone only.
Other ways to reverse audio
If you are already working on a computer, free editors such as Audacity and the Mac version of GarageBand can reverse a clip too. The trade-off is time: you need to transfer the file, open the editor and find the command. On a phone, an app that does one thing is faster, especially when you only want to hear how a word sounds backwards.
Tips for better results
- Record close to the microphone. Reversed background noise swells in and can swamp a quiet voice.
- Keep it short. Two to five seconds is the sweet spot for words and lyrics.
- Try a sustained note. A hummed note or a "ahh" reversed sounds like a synthesiser swelling up and cutting off. Here is why.
- Make a game of it. The reverse talking challenge turns this into something to do with friends.